The Cat in the Hat’s Hat Snack
Posted on: February 25, 2012
We are all about Dr. Seuss. Oh wait, no I’m all about Dr. Seuss. If I could talk in rhyme all the time, it would surely be sublime. Anyway, with Dr. Seuss’s Birthday coming up on March 2, we are doing a whole week’s worth of Dr. Seuss activities.
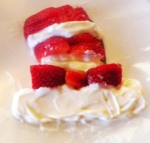
Surely, some will be outlandish and very silly, but this one my friends will surely be delicious. We printed out some small images of the Cat in the Hat’s Hat to use as our template. We put the template on a plate, covered it with plastic wrap, then made the Cat in the Hat’s hat using strawberries and yogurt.
It looks too cute to eat, but we did and it was such a treat!!
– Michelle
Muffin Cup Snowflakes
Posted on: February 19, 2012
We recently attended a festival where I always like to have a craft table setup. This festival was a Winter festival, and although there is very little snow this year, I really wanted to do a snowflake craft.
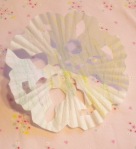
I finally decided on having the children make snowflakes using muffin cups. You could also use coffee filters, but the muffin cups seemed to be an ideal size.
I had markers, crayons, glitter, and stickers for the kids to decorate the muffin cups. If they chose to decorate the muffin cups. Many of them wanted to leave them white.
They folded the muffin cups in half 3 or 4 times and made random cuts. When they opened them up, they were beautiful!!
Some of us (including myself) even made snowflake flowers.
Ahh yes a world where snowflakes are flowers … what a world that would be.
– Michelle
Valentine water globes
Posted on: February 11, 2012
I feel like this post may need a disclaimer because it could get messy. We’ve had ours hanging for a few days and haven’t seen any water leaking or sudden bursts, but I can see it happen. So please <insert disclaimer> only do this craft in an area where water spills can be easily cleaned or preferably outside (if you’re not in an area where it’s 20 degrees).
We made these water globes using paper plates, heavy ziploc sandwich bags, glitter, water, food coloring, crayons, glue, tape, and foam heart stickers.
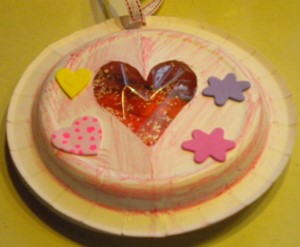
First we folded the paper plates in half and cut a heart shape along the fold. Once we opened the paper plate, the heart was in the center.
We then decorated the plate using crayons and some foam heart and flower stickers.
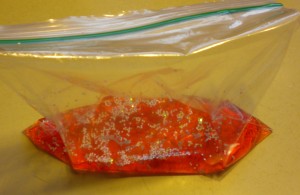
We added a little bit of water, a dash of red food coloring, and some pink and white glitter in a ziploc bag. We zipped the bag close, shook it, and watched the water turn red and glittery.
We then added lots of tape to the ziploc bag then taped it to the back of the paper plate.
We added another paper plate to the back, and put a ribbon on the top.
– Michelle
Chocolate heart play dough
Posted on: February 11, 2012
In a previous post, we wrote about the Christmas play dough that we made. We loved the Christmas play dough so much that we thought it would be great to do the same thing for Valentine’s Day. We used the same recipe and made one change. We added one tablespoon of cocoa and …
I know … these look good enough to eat, but they are not. Please do this project only with children who you are sure will not eat the play dough. And have a Happy Valentine’s Week!!
– Michelle
Fishing for hearts
Posted on: February 8, 2012
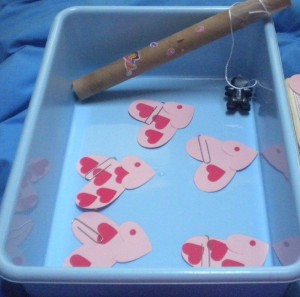
Love is in the air and in the water. We made this heart fishing game using:
– cardstock
– heart paper punch
– paper towel roll
– string
– magnet
Our fish were made with love, I mean hearts (one large one for the body and a smaller one for the head). We added a paper clip to each fish, and added a different number of hearts on each one to make this into a counting game.
My daughter decorated the paper towel roll, which we then turned into a fishing pole by adding string and a very large magnet
The object of the game is to catch a fish using the pole. Once you catch one, you count the number of hearts and match it to a heart with the corresponding number.
– Michelle
We heart the Groundhog
Posted on: February 2, 2012
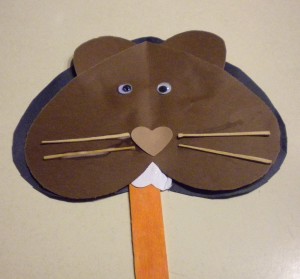
We’re not sure if the Groundhog will see his shadow, but we’re prepared either way. We made these heart groundhogs using:
– Construction paper hearts (a large one for the face, a smaller one for the ears, and an even smaller one for the teeth and nose)
– Glue
– Scissors
– Googly eyes
– Tooth picks (ones that do not have a pointy end) for the whiskers
– Craft stick
We added a larger black heart behind his face to act as his “shadow”. We just put a small amount of glue at the center of the black heart, so that if the groundhog does not see his shadow, we can roll it away.
– Michelle
Football Prints
Posted on: January 30, 2012
With the Super Bowl coming, we have been trying to think of some great football projects. Here’s one that is pretty simple and requires very few supplies.
You will need paper towel or toilet paper rolls, paint, scissors, construction paper, and glue.
First cut the paper towel or toilet paper rolls into little footballs. The kids can dip them in paint and make a football picture. You can also make football fields with the construction paper and glue.
Simple, fun … TOUCHDOWN!!
– Michelle
Football Jersey Shakers
Posted on: January 22, 2012
For the big game, we decided to do something special, and what is more special than a shaker. One that makes a lot of fantastic noises when your team gets a touchdown!!
Supplies:
– Cardstock or construction paper
– Scissors
– Glue and tape
– Dry rice
– Crayons, markers, computer printouts, football logos, numbers, letters, etc. to decorate your jerseys.
– Craft stick
1. Fold a piece of cardstock in half, and cut a jersey shape out of blue cardstock without cutting the fold.
2. Decorate the jerseys using crayons, markers, print outs from the computer, numbers, football logos, etc. You could also have letters for adding names to the jersey.
3. Glue the edges of the jersey, leaving an opening at the top. We also taped the edges, so there were no small openings.
4. Add rice to the opening at the top. You don’t need a lot of rice. Once the rice is added use glue and tape the top to close the opening.
5. Add a craft stick.
6. Shake, rattle, and cheer for your team!!
So who’s it going to be … the Patriots or the Giants?
-Michelle
Valentine’s Day duct tape bag
Posted on: January 21, 2012
Ah, so they begin already … Valentine’s Day crafts. I heart Valentine’s Day and really HEART Valentine’s Day crafts. So here’s one we put together that will be perfect to hold all the Valentine cards that we receive.
You can make bags a number of different ways, but we did it with … duct tape, of course!
1. Start with strips of duct tape sticky side up.
2. Cover all the sticky duct tape with more duct tape, so that it’s no longer sticky.
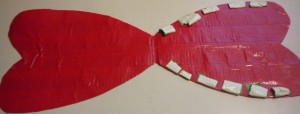
3. Fold in half and cut out a heart shape, or whatever shape the children want for their bags.
4. We added more duct tape to the inside of the bag, as our way of “seaming” (is that a word?) the outside. Children can also wrap duct tape around the outside of the bag.
5. If children would like to, they can add a handle. We put a pipe cleaner on the sticky side of another strip of duct tape.
6. And rolled …
7. We then used a hole punch and made two holes in the back of our bag. We put the pipecleaner handle into the holes, then added two small pieces of duct tape to the inside to hold our handle.
8. Let children decorate their bags using more duct tape or by drawing on their bags (ball point pens work the best).
Love & duct tape!
– Michelle
Snowflake Mobile
Posted on: January 16, 2012
Yesterday, I posted our snowflake prints that were made using paint and skewers. Today, I’m posting the second part of this project, the snowflake mobile.
We used two of our larger snowflakes at the top of the mobile, then had the rest of them hanging from the two larger ones. We used a blue and silver ribbon. We finished it off by hanging it with a pipe cleaner (yellow, the only color that we could find). We were looking for more of a wintry color for the pipe cleaner, but now I think the yellow is perfect. It’s like a little bit of sunshine mixed in with all the snow.
– Michelle
